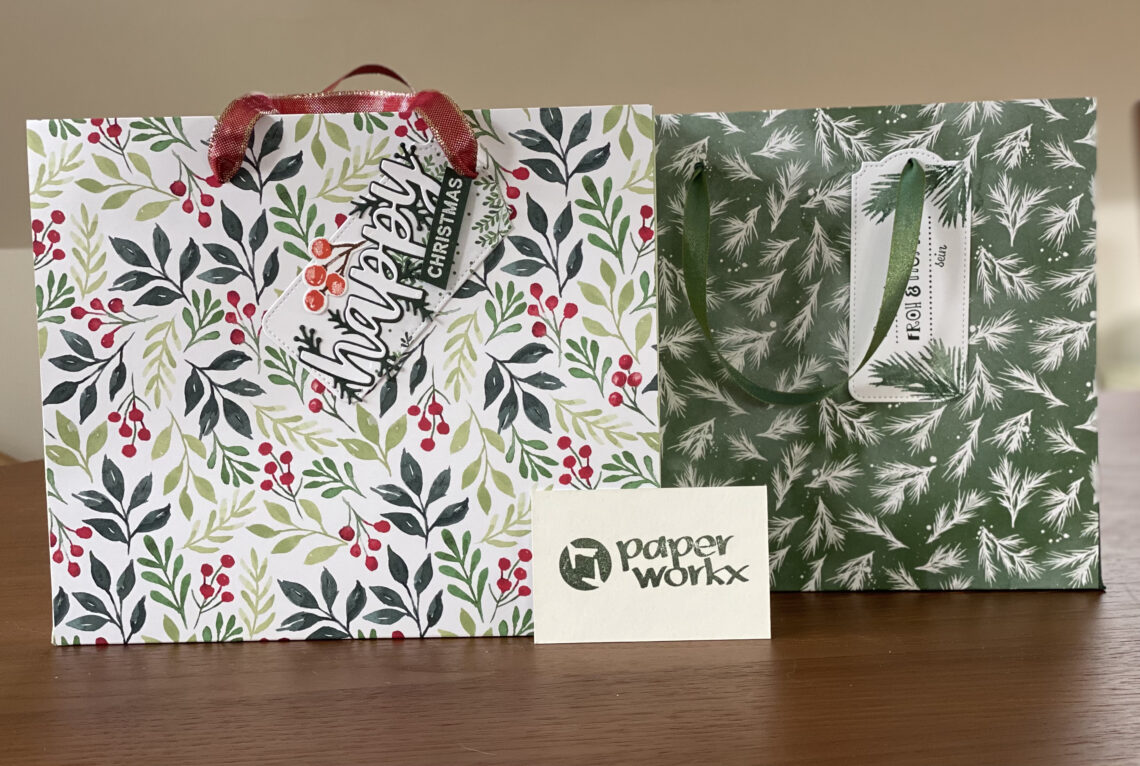
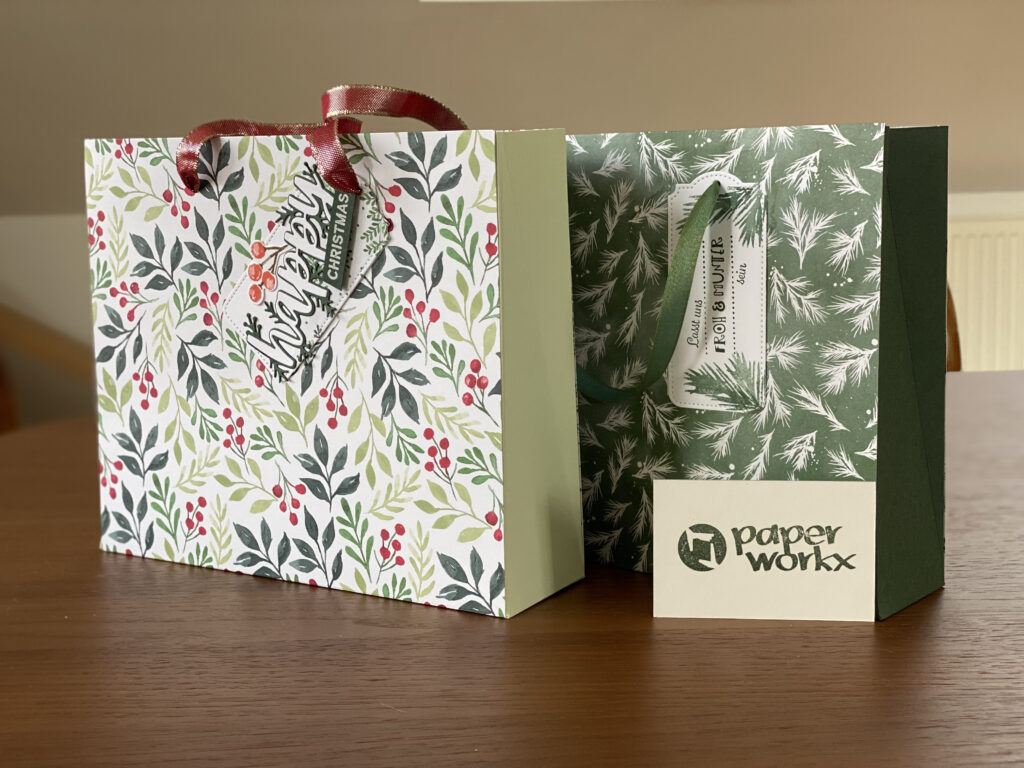
Beautiful Giftbags! (English Instruction)
So many of you requested an english tutorial for the gift bags , I decided to provide one on my blog!
Attention: I had to adjust the size in inches slightly, therefore the bag will be a little bit bigger if you follow the instruction in inches!
First of all you need 2 sheets of designer series paper 12″x12″ and 1 sheet of cardstock A4 in a suitable color.
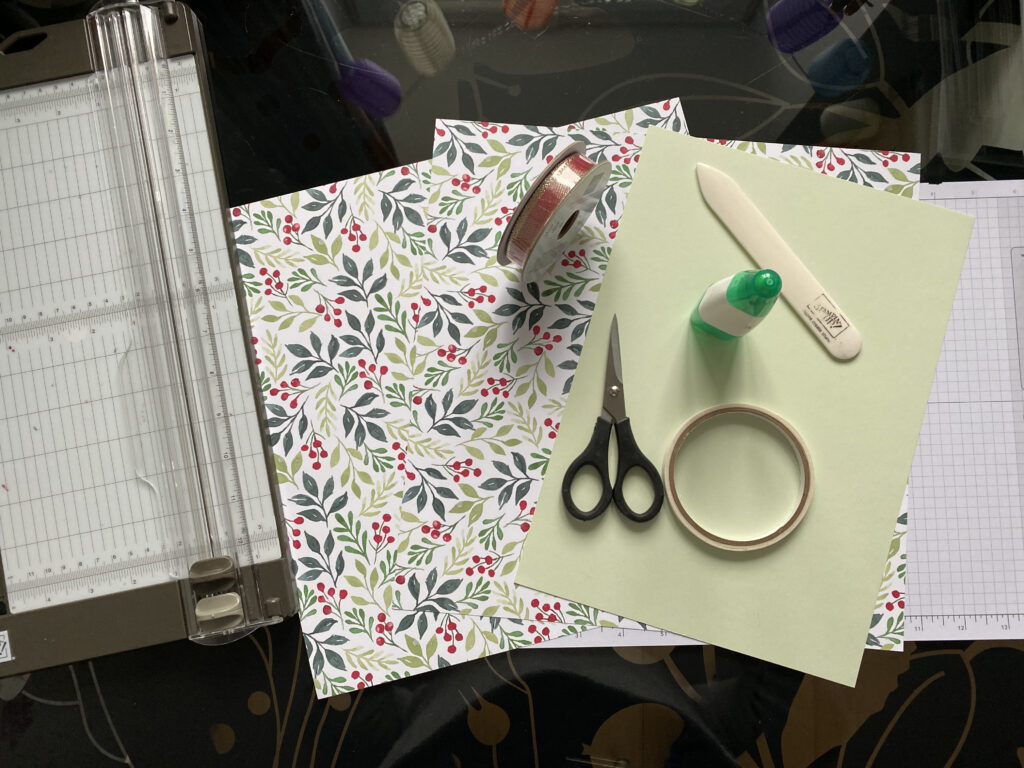
Items additionally needed are tear&tape adhesive, liquid glue, paper trimmer, scissor, bone folder, a suitable ribbon and a hole pliers.
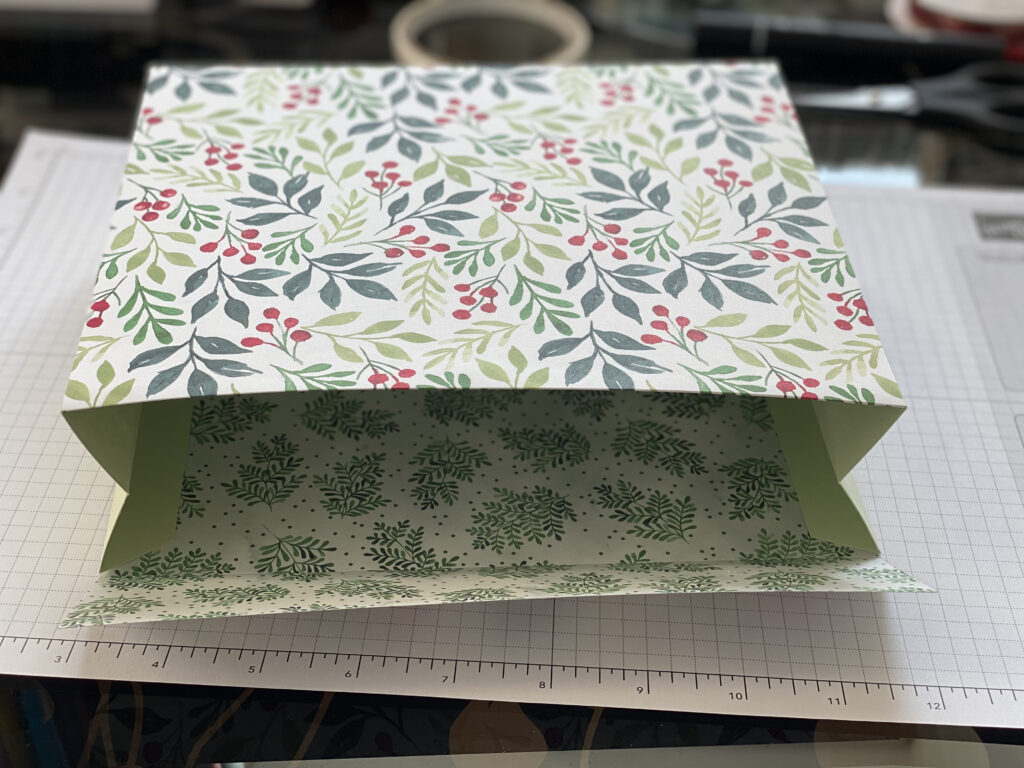
The finished size of the bag will be 19cm x 22cm (7 1/2″x 8 3/4″) with a depth of 6cm (2 1/2″).
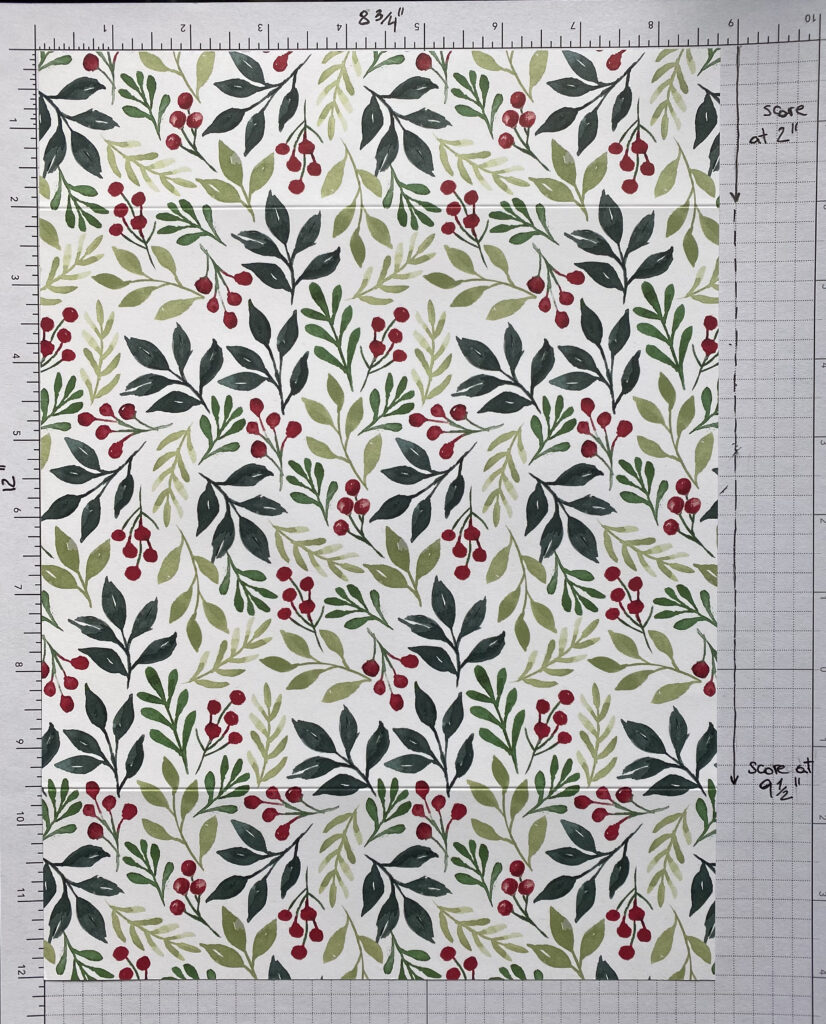
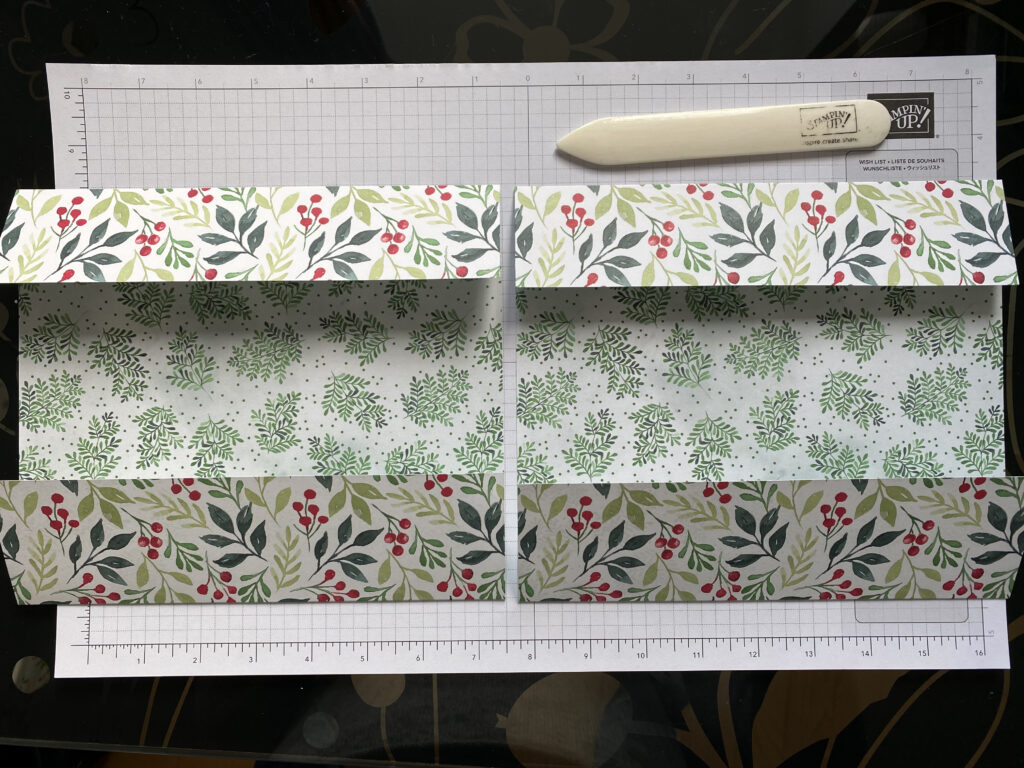
Start by cutting the DSP at 22cm (8 3/4″) from the side and 30cm (12″, which means you don’t have to cut! ) from the top. Take the long side and score at 5cm (2″) and 24cm (9 1/2″) and fold to the back side. Be careful to score the 5cm (2″) from top of paper to get the right direction of running of the pattern!
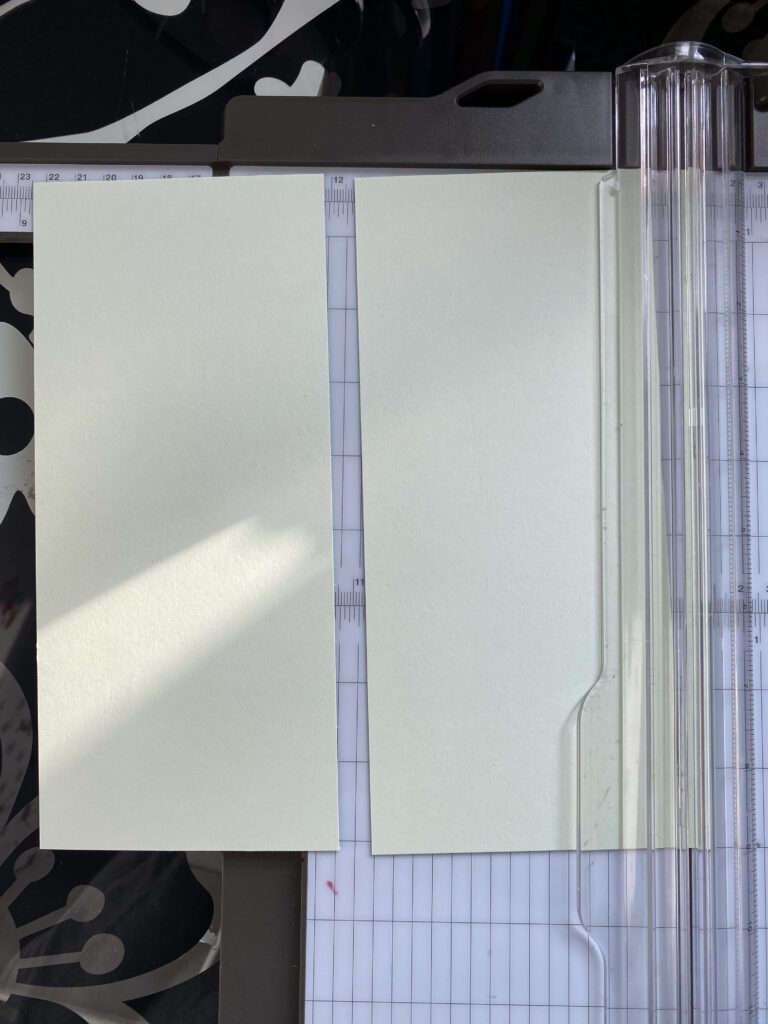
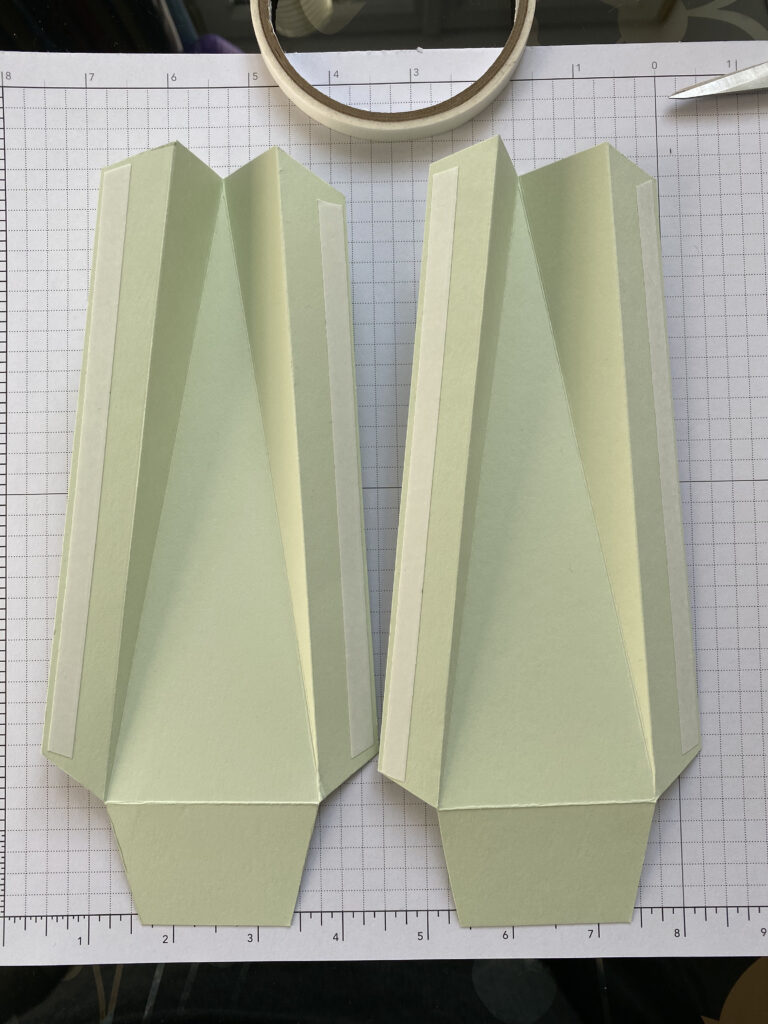
Thereafter cut the A4 cardstock at 23cm (9″). Turn and cut at 10cm (4″) two times.
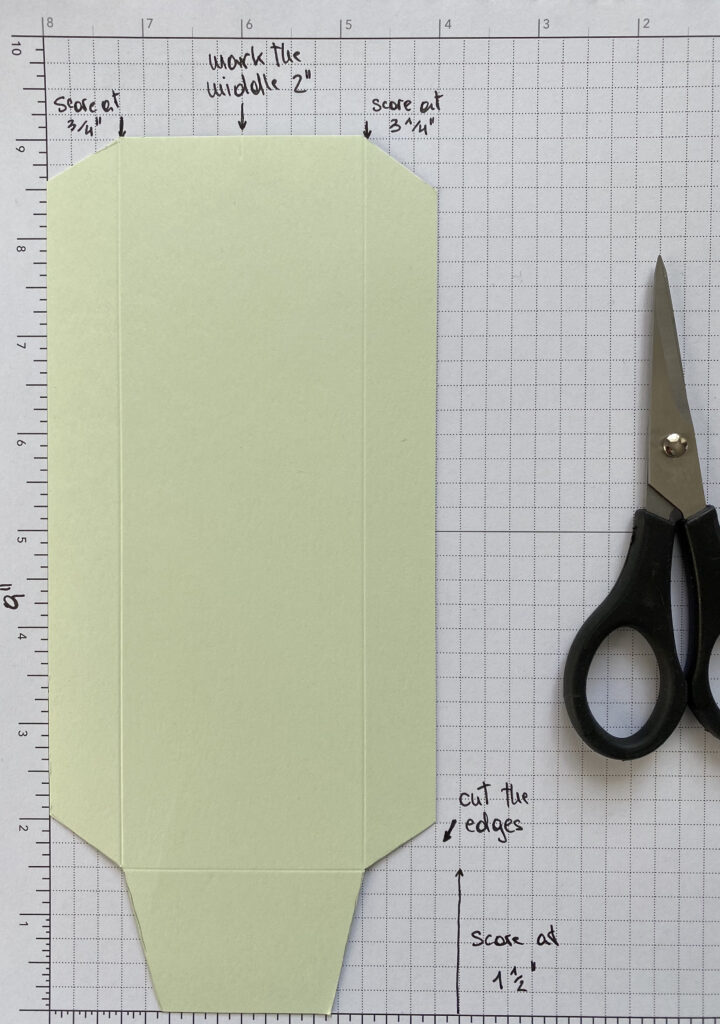
Score the 10cm (4″) side at 2cm (3/4″) and 8cm (3 1/4″) and slightly mark the upper middle – which is at 5cm (2″). Score the bottom at 4cm (1 1/2″).
Cut the corners as shown in the picture below!
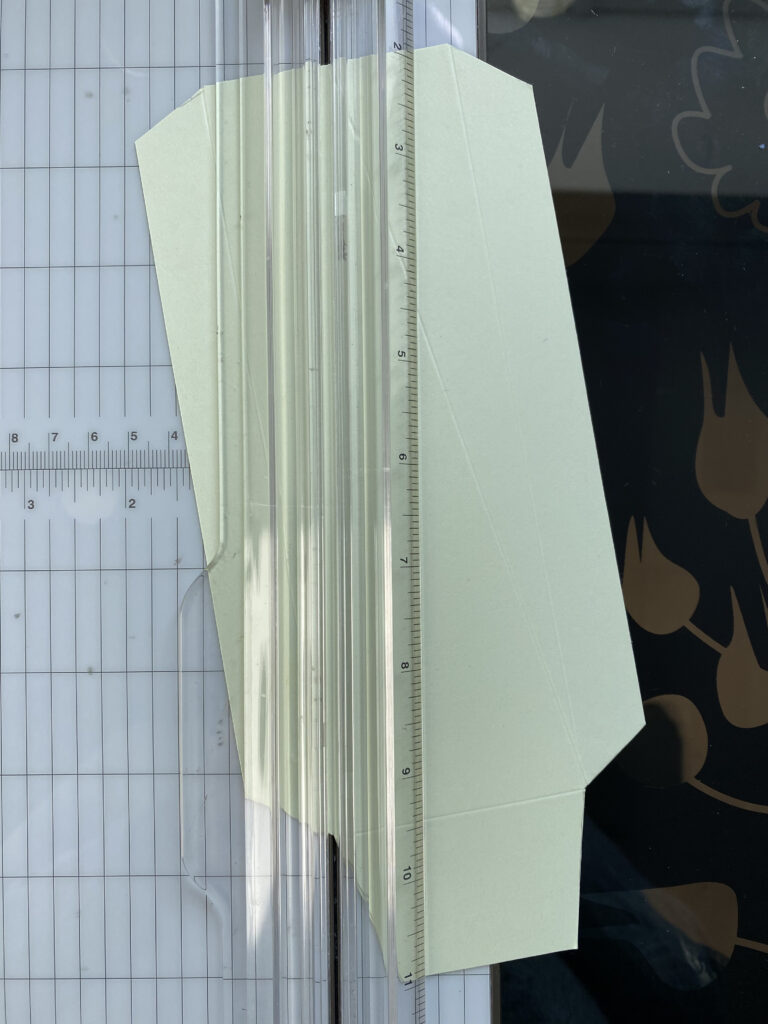
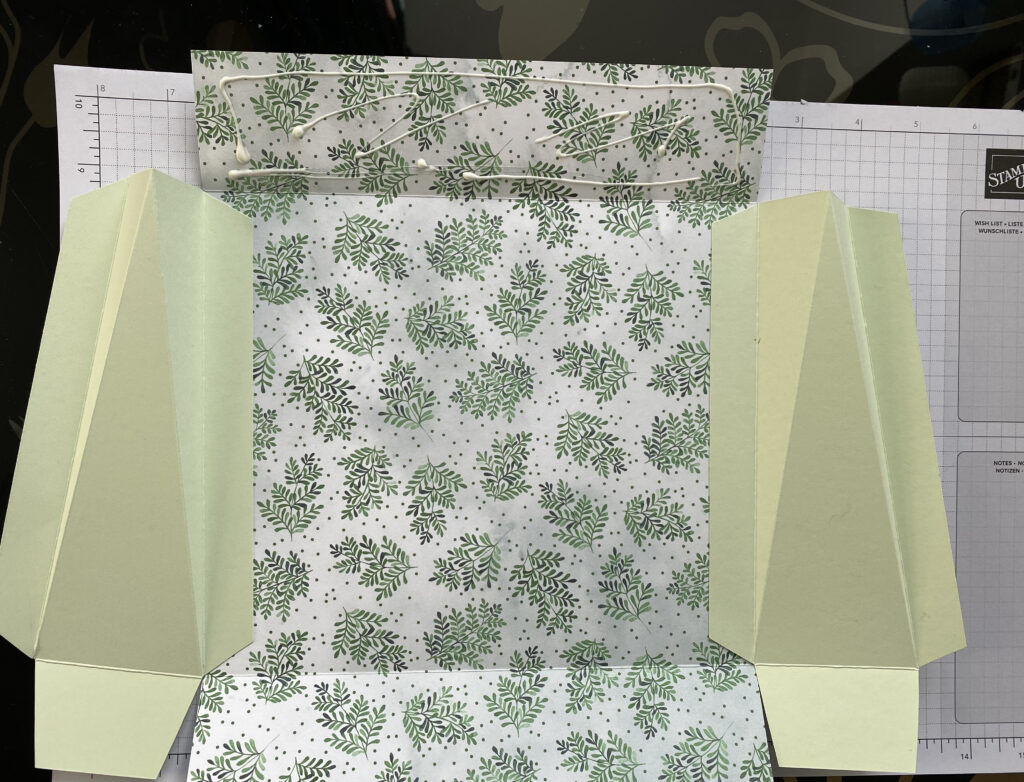
Then you have to score from the mark in the middle to the cut-out corners on the bottom as shown in the next picture.
Attach the adhesive tape to the taps on the left and right side. Fold the taps to the back (side and bottom) and the oblique fold in the other direction.
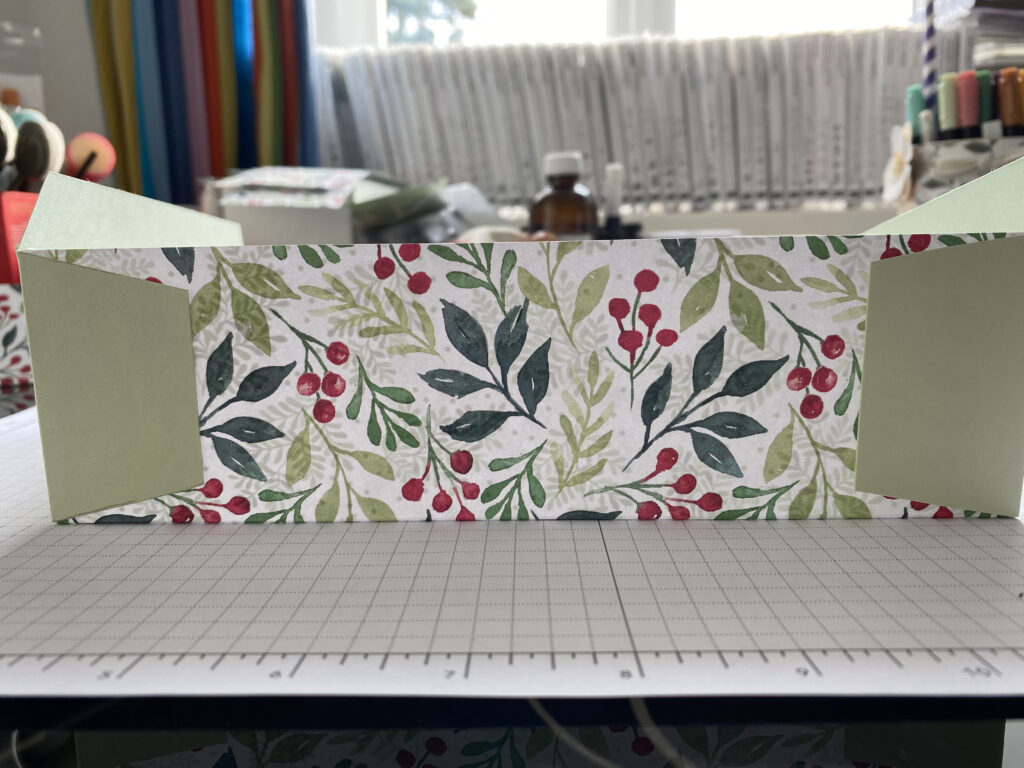
Now you can attach the side parts to the back part by slowly pulling off the film from the adhesive tape and putting the parts together edge on edge. Put glue on the upper tap and fold to the inner side.
After that put glue on the left and right bottom tap and adhere them to the bottom tap of the back part.
Then you can start to glue the bottom of the front side to the bottom of the back side and finally attach the side taps to the front part as shown below:
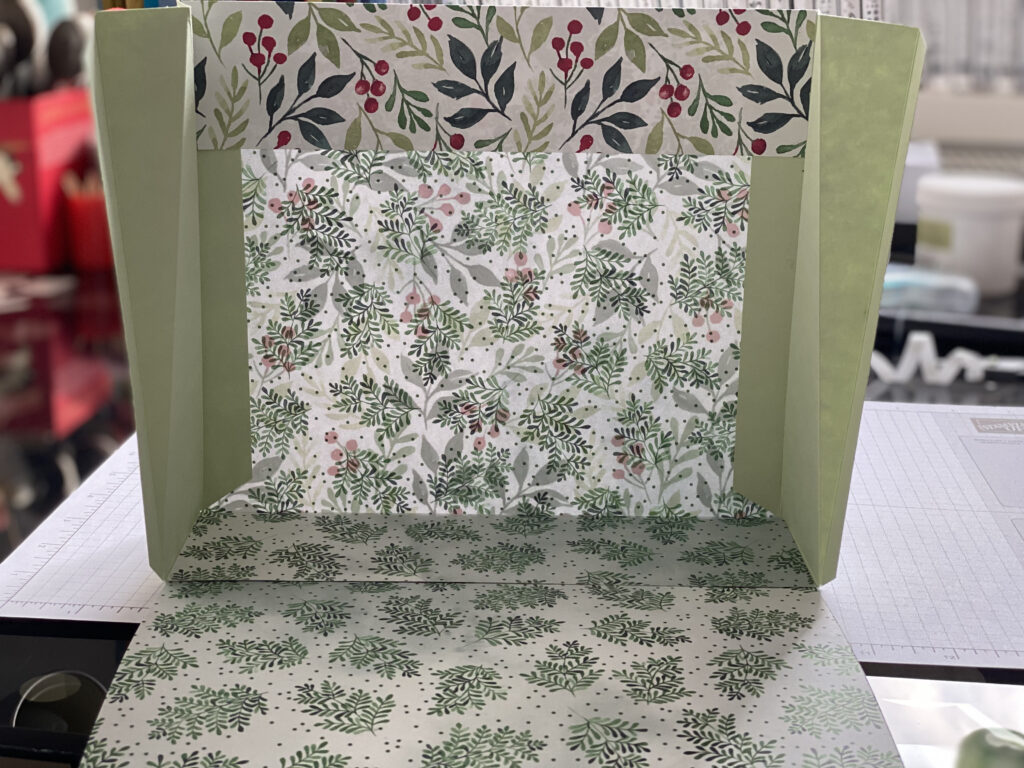
The last step is to glue the tap on top of the front to the inside.
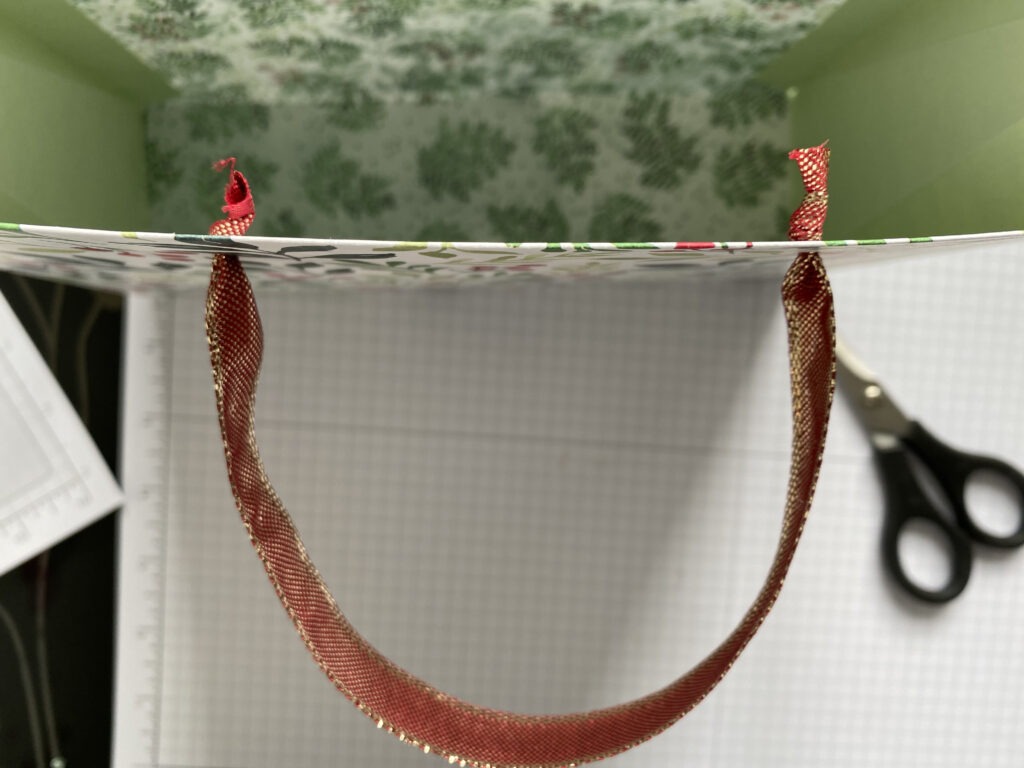
Now you only have to punch two holes on each side so that you can fix the ribbon and a tag designed to your need! Length of the ribbon should be 31cm (12″)

It’s my first instruction in english and I hope that it is easy to understand and that you will have a lot of fun creating your personal gift bag!


Was dir auch gefallen könnte
Gutscheinkarte Schneeflockenwünsche

Personalisierte Muschelkarte